INN STYLE BEST PRACTICES
A GUIDE TO IMPROVED ACCOMMODATION PHOTOS
OUR AIM WITHIN THIS ACCOMMODATION PHOTOGRAPHY GUIDE
We all know that hiring a professional accommodation photographer can be expensive. So we decided to put a guide together, which was shot at one of our customers properties, Kings Head Bawburgh, to help show you how you can take professional photos of your accommodation using just your mobile phone.
We will demonstrate better phone handling, phone camera app usage and how to access the basic editing tools, on a modern smartphone.
TOO DARK, TOO LIGHT OR JUST RIGHT?
It is best to let a lot of light into the space for accommodation photography, so open the curtains and turn on the lights whenever needed. Avoid using the camera flash almost always. When taking a good photo, the light level (also known as exposure) is usually the most important consideration for a photographer. A hospitality photo that is too dark, can make things look unappealing, questionable or dank. One that is much too bright, can wash out details and give a cold, clinical or uncomfortable feel.
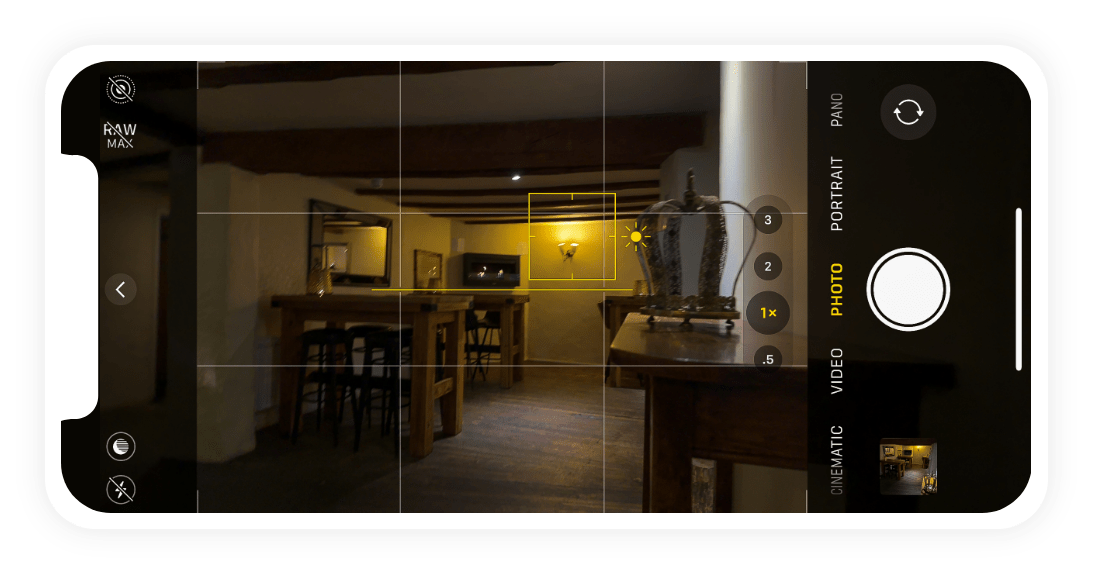
While about to snap a photo on a phone, most all modern phones will allow you to finger tap on what you see on the camera screen, to select what you want to focus on.
Trying this, before you are about to take a snap: If you tap on a dark area of the camera screen, it will focus there and brighten the photo up. Now vice versa… If you tap on a bright or light source area of the camera screen (such as a window or lightbulb), it will focus there and darken the photo. Give this a go, tap around different areas of the camera screen on your phone before taking the snap, to focus on lighter or darker parts, and see how it changes the overall brightness and exposure of the photo.
After tapping around the camera screen, snap the photo when the camera screen brightness looks just right, this is how bright the photo will turn out. If you can’t get the photo light level right, try letting more or maybe less light into the space and try again.
TOO DARK, OR JUST RIGHT?
Here is the phone camera screen: Finger tapping the screen on a light source, will focus on it. In this example it’s focusing on the wall lamp above. So tapping on a light part of the screen – darkens the photo. However, this is now Too Dark, lets try…
TOO LIGHT, OR JUST RIGHT?
Finger tapping on what was a dark area of the screen and focusing on the shadow under the table in the lower left above – this lightens the photo. However, this is Too Light, lets try…
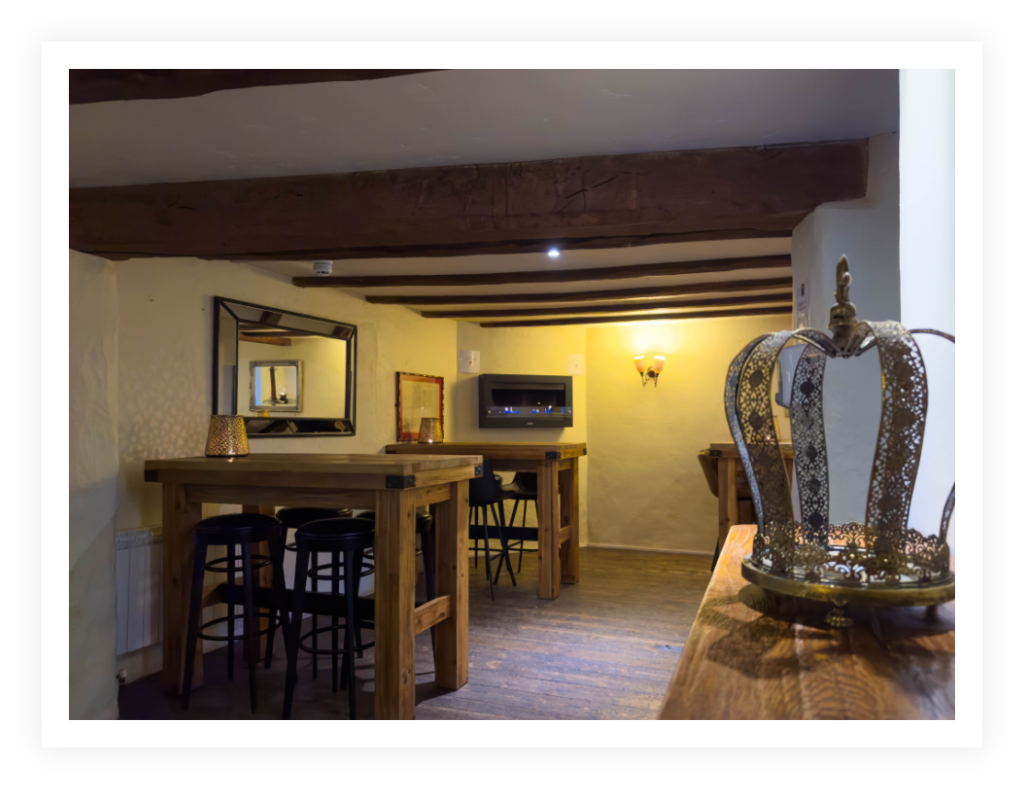
JUST RIGHT.
The right level of brightness and light in a photo, can set the feel and show detail better. How to get it ‘just right’.
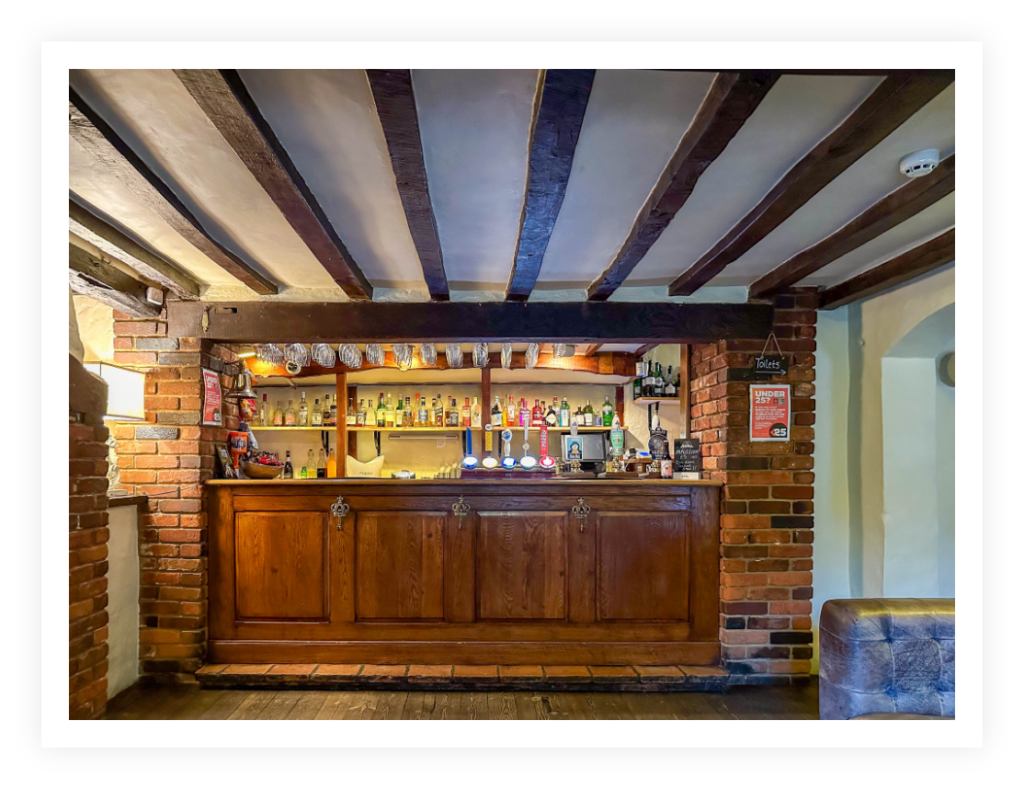
STRAIGHT AND SQUARE
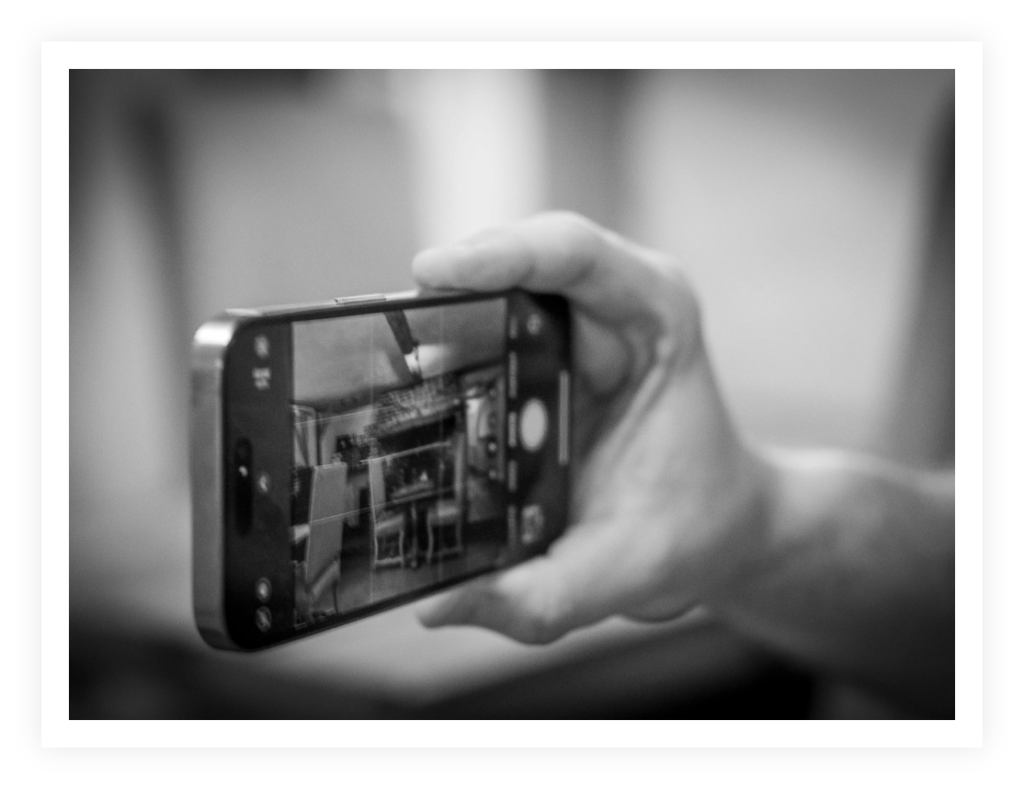
Keeping the phone levelled, upright and aligning the phone’s camera ‘Straight & Square’ to the object – will add to the professional look of your photos.
When taking accommodation photography that contain windows, sills, wardrobes, shelving, tables and desks, radiators, bed posts, fences and walls, the pub bar, or anything that has an upright and straight line edge.
Aim to move and hold the phone straight, level and upright, to the main object you’re taking a snap of – so that the phone is held ‘Straight & Square’ to the object before taking the photo.
It’s not always possible to get everything to appear perfectly upright and level in a photo. But on snapping the main object in the photo (maybe it’s a window or some bedroom furniture), appearing as ’Straight & Square’ as possible on the phone screen, by moving the phone level with it.
Also, moving the phone back and forth, nearer or further from the object, can help.
Sometimes, moving the phone height higher or lower from the ground – to align with the height of the main object of the photo – can help.
You can use the top and side edges of the phone screen – as a straight edge – to help square-up the phone’s camera ‘Straight & Square’ with the objects in the photo. Like what you see on the screen, then snap away!
DON'T TILT FORWARD AND BACK TOO MUCH...
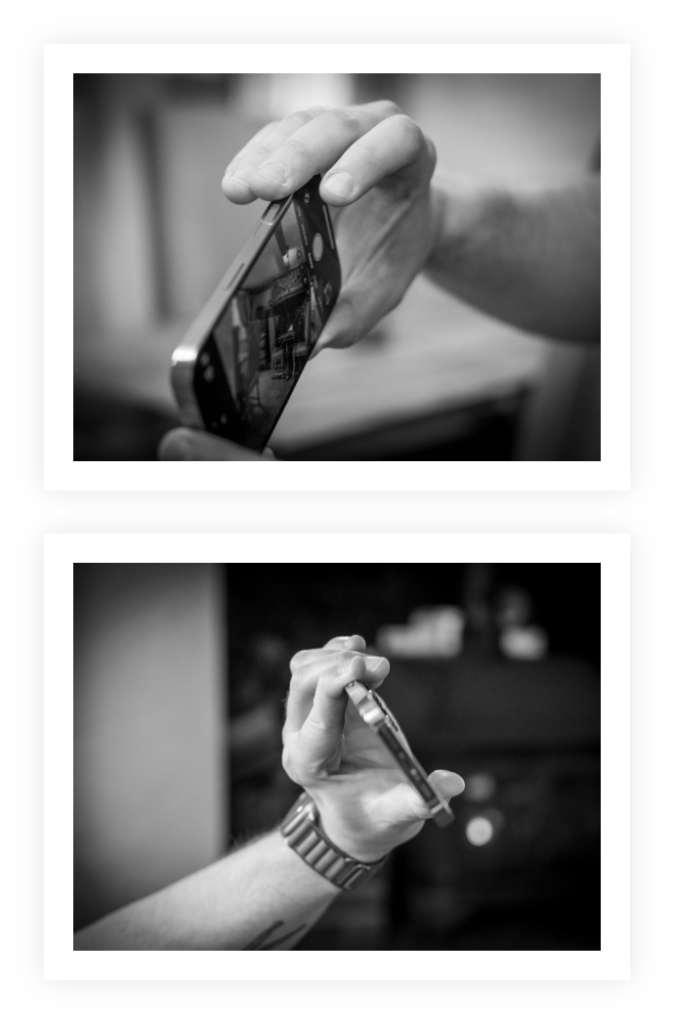
TRY NOT TURN IT LEFT OR RIGHT...
Holding the phone camera ‘Straight & Square’ to the objects you’re snapping, will give the better results.
PERSPECTIVE AND HEIGHT
Moving the camera to different heights from floor level and different areas of the same space, can capture a more natural viewpoint. With an aim to capture photos to resemble how guests would themselves view it.
It is good to consider where in the room and from how high – from floor level – the phone camera is being held when snapping photos of your accommodation – this is the ‘perspective’.
Holding the phone camera up high for the photo, may allow for more of the space to be seen, but likely offers an ‘unnatural’ viewpoint. Too low, and the space can also appear small and cluttered.
The rule of thumb is to consider how the space would mostly be viewed by a guest while they are using it… For example: Guests spend most their time when in the bedroom and restaurant at a seated level, with their eye-line about 4 ft from floor level. So when snapping these spaces, try holding the phone at that height, even try using a seat yourself while snapping. However, sometimes this height may not be ideal if things block the view – like chair backs or decor – just get the perspective as close to the ideal position that looks best.
If the camera height is too high or low to the object you’re snapping, it can askew and misshapen objects in the photo. Holding the phone ‘Straight and Square’ and aligning it to the same height as the object you’re snapping – gives more professional results.
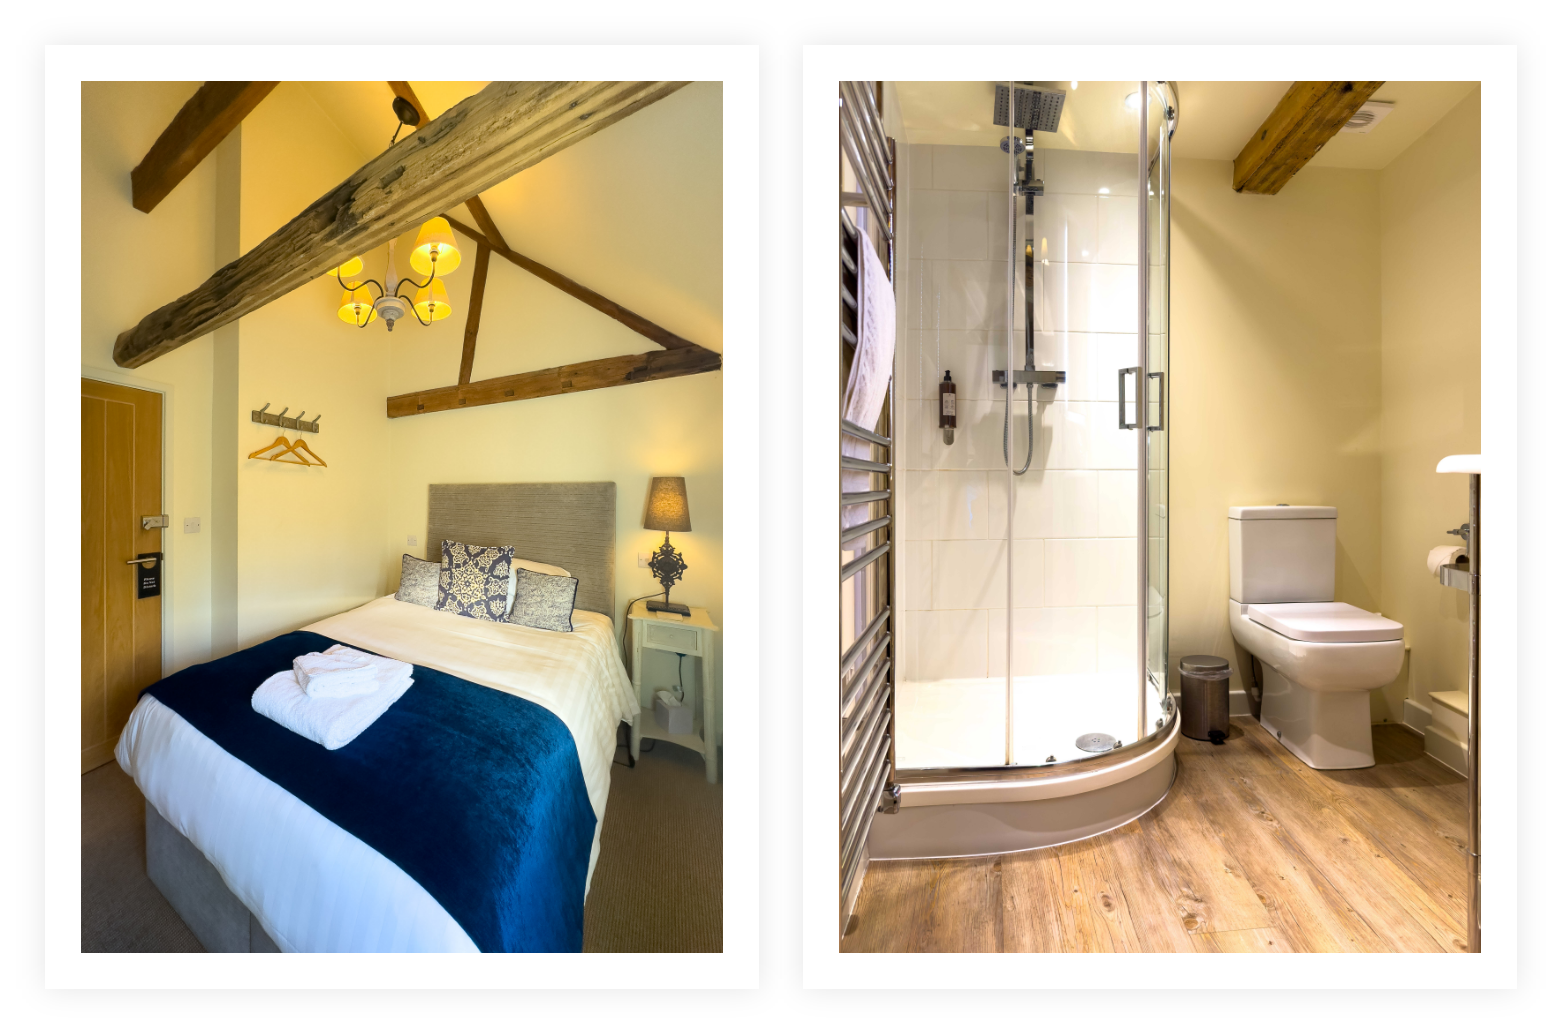
One thing to bear in mind, especially for hospitality images: Is not to take photos of private spaces (such as bedrooms and bathrooms) from an ‘up high’ position, as these often subliminally resemble the common perspective and height of CCTV cameras or spycams, which can be off-putting.
Try taking photos in the same spot but using different phone camera heights. Even assume the sitting or relaxing perspectives the guests are likely to have at your accommodation and see what photos you capture.
Snap away and compare photo results of the different phone camera placements and heights, snapped in the same space.
HELD TOO HIGH, IT CREATES AN UNNATURAL, SKEWED VIEW.
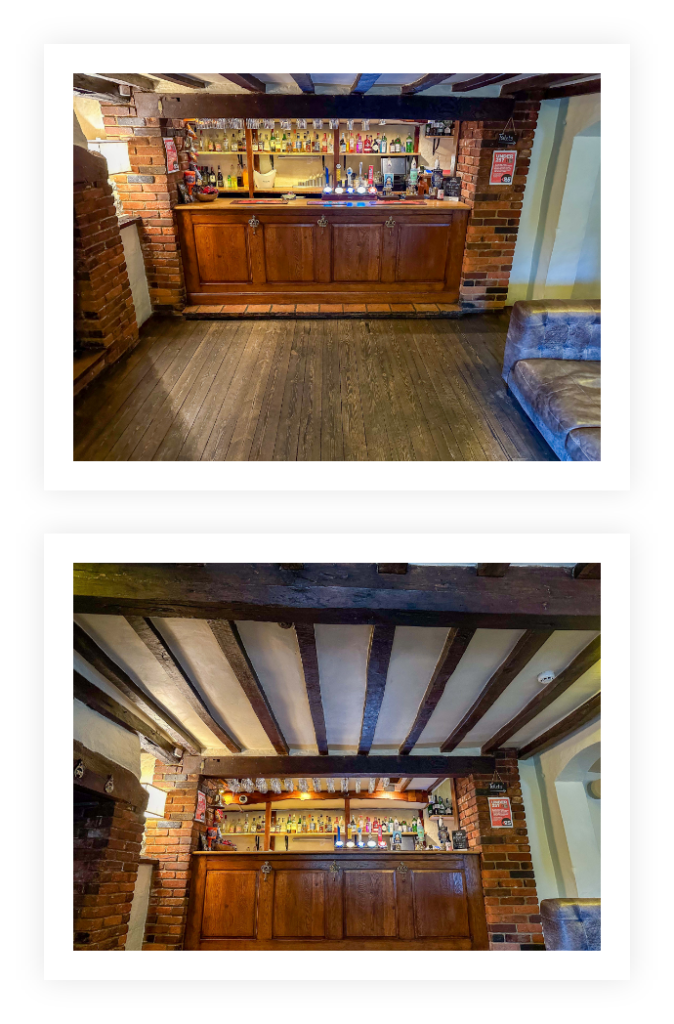
HELD TOO LOW, IT CREATES AN UNNATURAL, SKEWED VIEW.
Holding it at centred, at a common seated height – can make it look just right, as a guest would see it.
A TOP DOWN ANGLE IS BIG 'NO' FOR PRIVATE SPACES
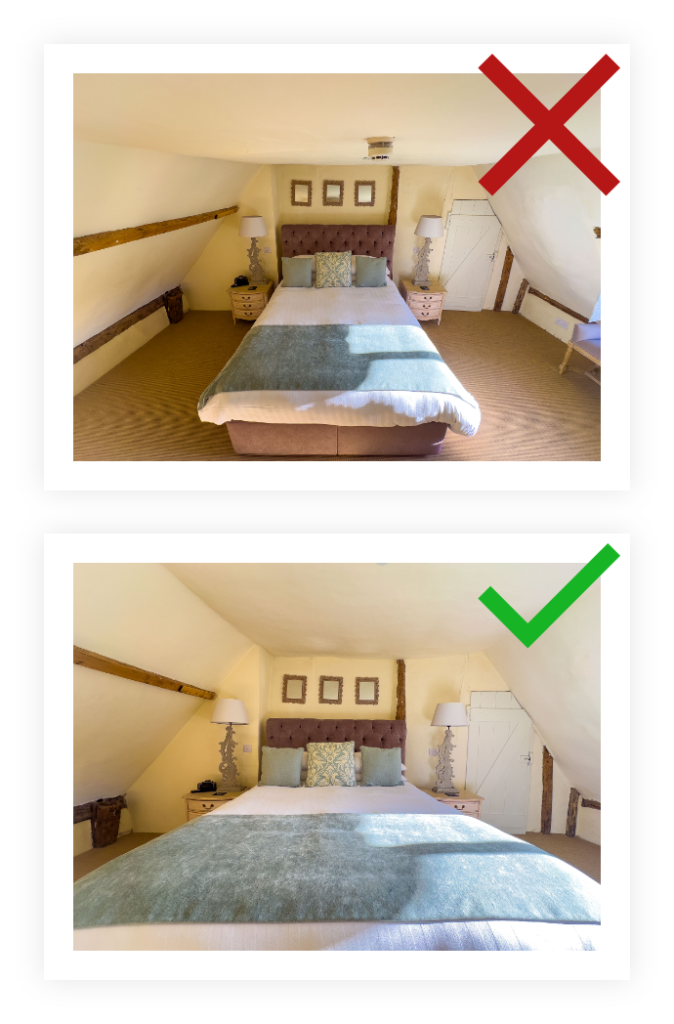
TRY A CENTRED PERSPECTIVE INSTEAD
WIDE SHOT OR CLOSE-UP?
When framing up a scene or object to take a photo of in the camera app, a close-up or a wide shot is best used in different situations for accommodation photography.
We can move forwards to get a tighter angle, or a ‘Close-up’ shot. Or move backwards for a ‘Wide Shot’.
Therefore, standing in the right place and also using the right zoom of lens on the camera phone, can offer us a better framed ‘Wide Shot or Close-up’.
When wanting a wide shot of a room, it’s best to stand tightly in a corner and also use the widest zoom lens on the camera phone (if available). This will capture more of the room and make it look more spacious.
When wanting to accentuate a decoration or something ornamental at your accommodation, it’s best to get closer and also try using the zoom-in lens. This will offer a more artistic focus and detailed view of the object.
Modern camera phones also have more than one lens on the back, we can switch between these in the camera app while lining up the photo… These different lenses offer different zooms, in or out… Thus, helping make the photo a closer or wider angle, without having to move, just select a different lens.
Moving the camera forwards and backwards, and trying the different zoom lenses on a phone, can be easier practiced with an everyday item being moved around a table. Why not try it with a cup on a table, moving the camera phone different distance to and forth from it, and also changing between lenses, to see the results?
THESE BUTTERFLY FRAME DECORATIONS ARE NICE, TRY TAKING A CLOSE UP
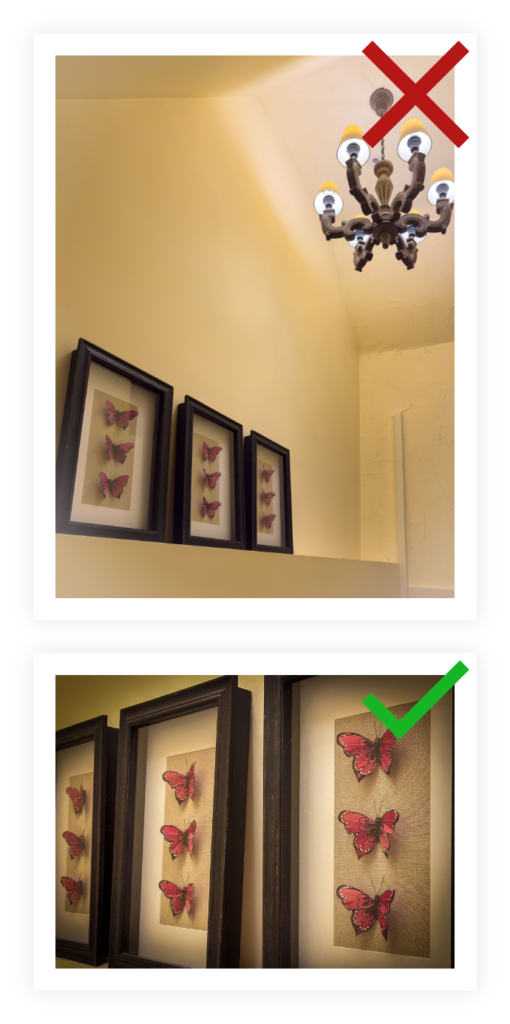
THIS WILL HELP THE GUEST FOCUS ON THE DETAILS OF YOUR DECOR
GET IN THE CORNER TO TAKE A WIDE SHOT...
When taking snaps of rooms, remember to stand tight in the corner and use the widest lens (if available) to take a ‘Wide Shot’ it will make the room look more spacious.
This is especially useful in smaller spaces, as these examples show.
TAKE THE CLOSE-UP INSTEAD OF THE WIDE SHOT...
Taking a ‘Close-up’ instead of a ‘Wide Shot’ can also be used to avoid taking photos of unwanted things.
CAMERA TRICKS AND WHAT TO SKIP
Before snapping photos, check that anything undesirable has been moved or covered, here are some tricks to avoid capturing unwanted things.
When taking photos of your accommodation, the best option is to first remove anything unwanted from the scene, such as cleaning items, bins, fire extinguishers and to give the place a good clean and tidy.
However, it is not always possible to remove unsightly things, as maybe it’s something common, like paintwork awaiting repair or some wires. Things we’d rather not see in nice photos.
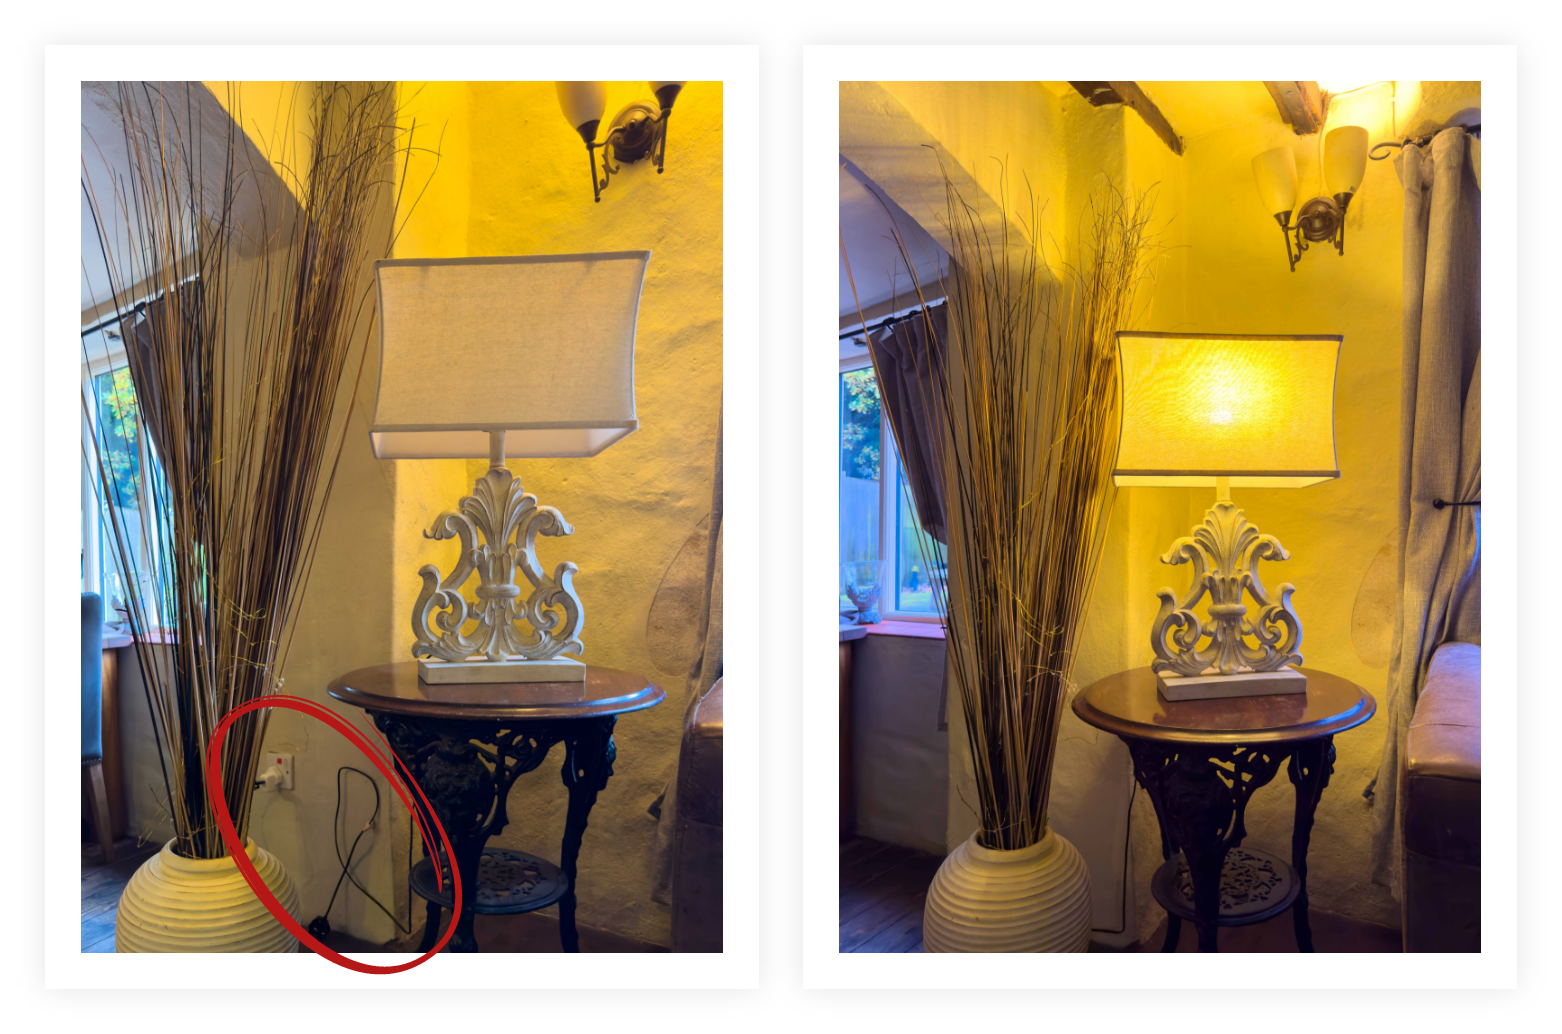
There are some tricks to avoid unsightly things when it comes to accommodation photography, such as moving decor or furniture in front of plugs and wires to cover them, or hanging a picture over a paintwork repair.
We can further use framing by taking the photo from a different spot in the room or using a ‘Wide Shot or Close-up’, to avoid things being in the photo.
We can use exposure and editing (making the photo a little darker or lighter) to make a space look more appealing or brighten up things, for example – a wall that should be bright white, but may have become a little discolored.
Be sure to remove unwanted things, clean and tidy first. Move decor and furniture in front of plugs, wires or repairs. Frame the photo closer up or change the perspective of the shot to avoid unwanted things. Try making the image darker or brighter to improve the colours and light.
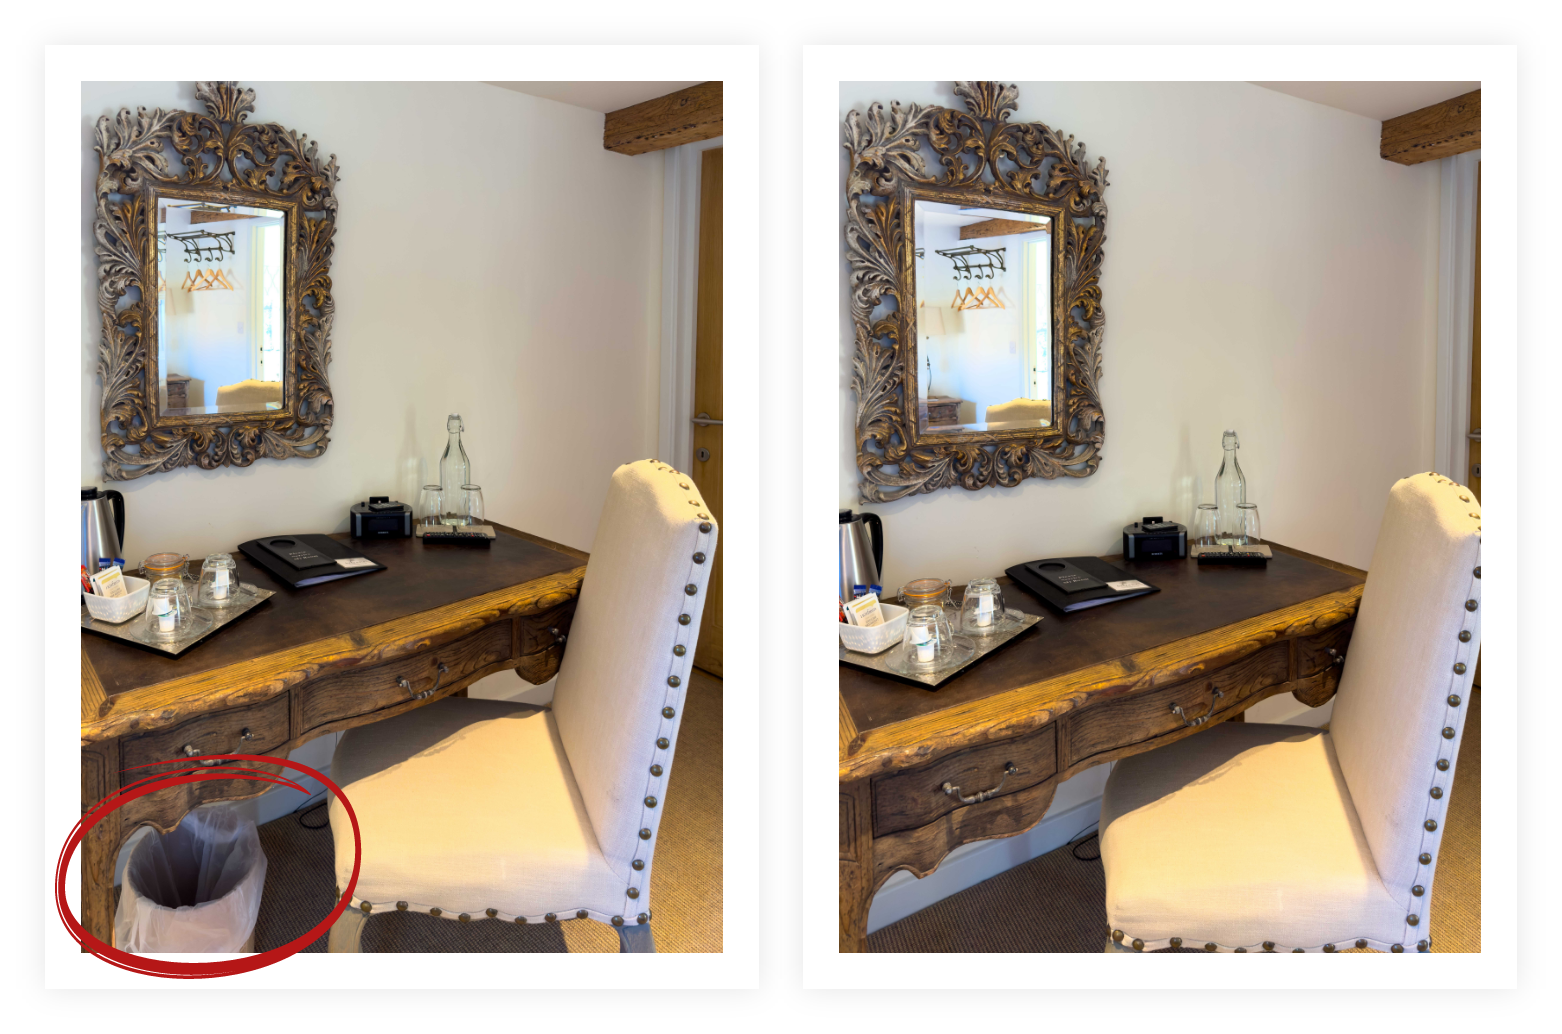
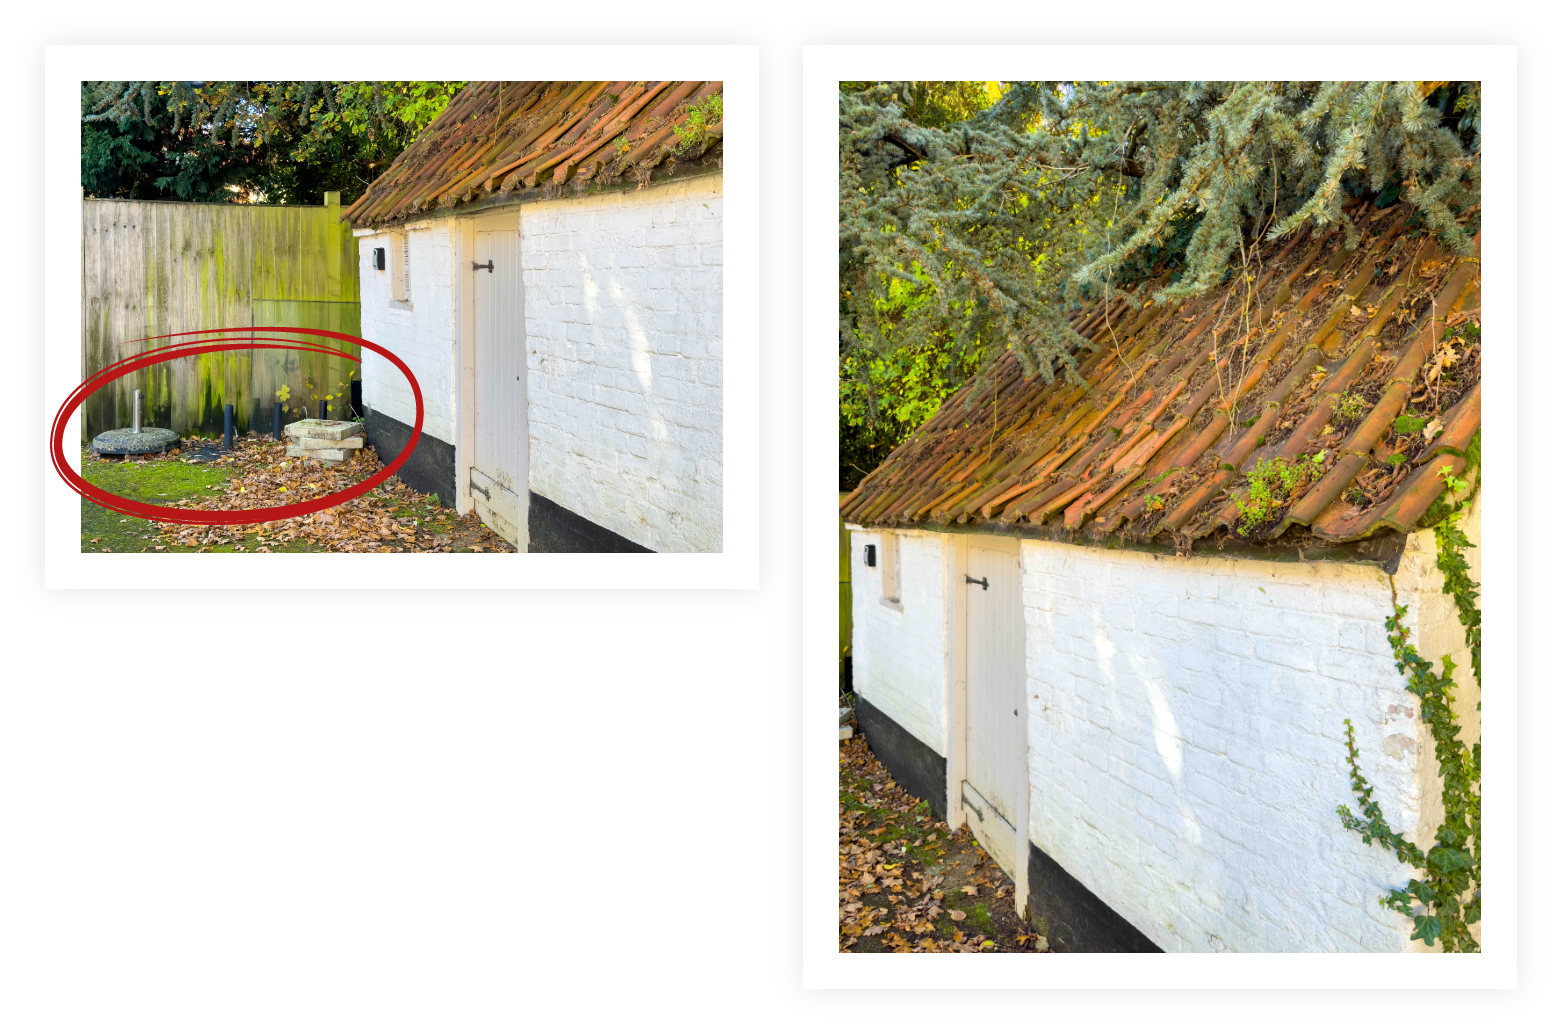
REMOVE ANYTHING UNWANTED
Look for anything unwanted in the accommodation photos and be sure to move it out of the way before snapping.
MOVE SOMETHING IN FRONT OF UNWANTED ITEMS
If undesirable things can’t be moved, try moving something in front and make neat, where possible.
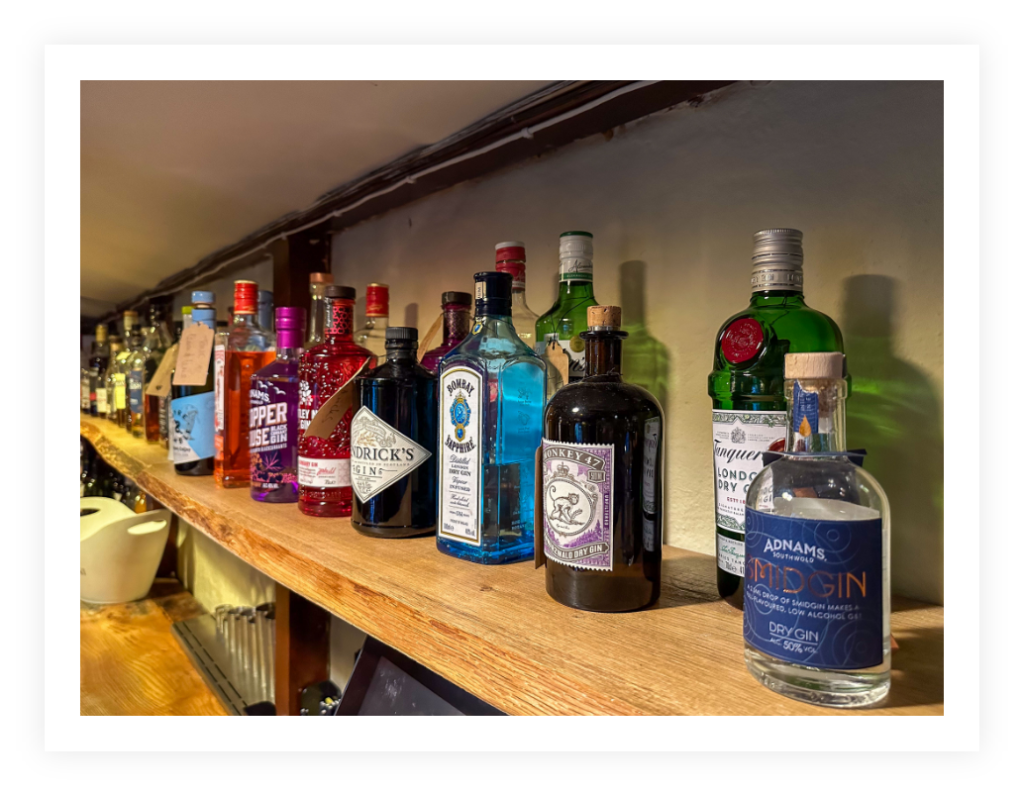
In this example: It’s good to show your drinks selection, but using a ‘Close-up’ shot of the bottles instead, will leave out the undesirable things on the counter top.
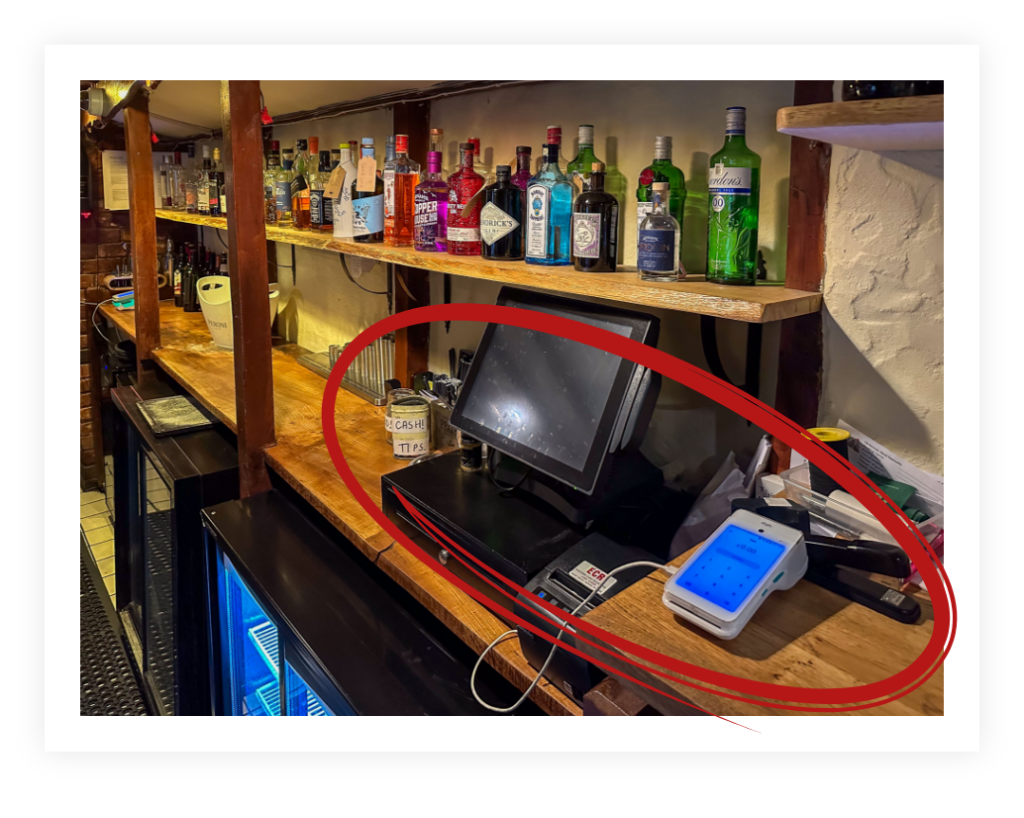
GO FOR THE CLOSE UP INSTEAD.
EASY ON-PHONE EDITS
Smartphones have easy to use, built-in basic photo editing tools. Which are found in your phone’s ‘photos’ or ‘gallery’ app… When looking at a photo, you should see an ‘Edit’ option. Basic editing or applying auto edit filters – is a must do for better accommodation photos!!
Some basic editing can really help to improve the look and appeal of photos. Improving the light, colours and straightening every photo, should be attempted. This can be done applying pre-set or ‘auto’ editing filters, or manually by moving a slider for each setting, when in editing mode.
Find a photo you’ve taken in the ‘photos’ or ‘gallery’ app. Once the photo is open, you should see an ‘Edit’ option on the screen. Click this, it will now show you some options, you’ll see filters and also have the option to manually adjust the brightness, colours and to crop (straighten and resize the edges) of a photo, if needed.
Most phones have an ‘Auto’ edit option and several ‘filters’ which you can easily apply to the photo, do try them. These are pre-set editing options that will automatically adjust lightness, colours and other settings, give them a go first, they can be great and save time.
Also, you can try manually adjusting each photo settings using a slider, if prefered… Once in ‘Edit’ in your photos app, you’ll see these options.
The most common general photo settings to best consider when applying filters or editing, are:
- Brightness – a well lit, brighter photo is ideal.
- Colours – increasing the colours a little so it looks more vibrant is ideal.
Straighten – windows, sills, desk, tables, the bar and other such things should appear ‘upright’. - Crop – moving the edges around to focus on an object and crop-out unwanted parts of a photo is sometimes better.
- Sharpness – apply this setting a touch if your phone has it, it’s great for making things in the photo clearer and better focussed.
Don’t hesitate to try applying filters, auto or manual editing – as there is a ‘Revert’ back to original option. You can always undo any and all changes and start again!
HOW TO GUIDE...
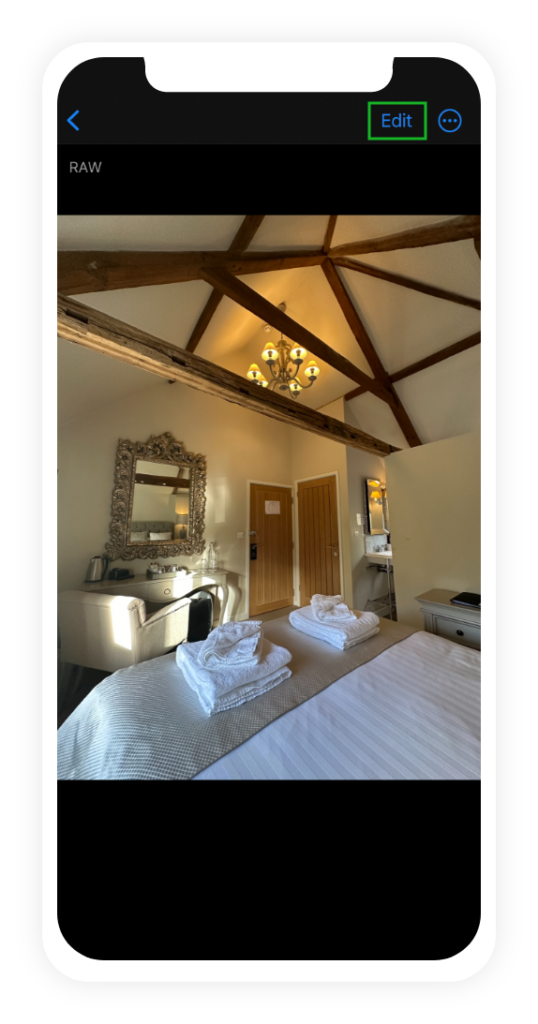
STEP ONE
Select the ‘Edit’ option in photo gallery

STEP FOUR
Under ‘Adjust’ change the ‘Brightness’ option slider as needed
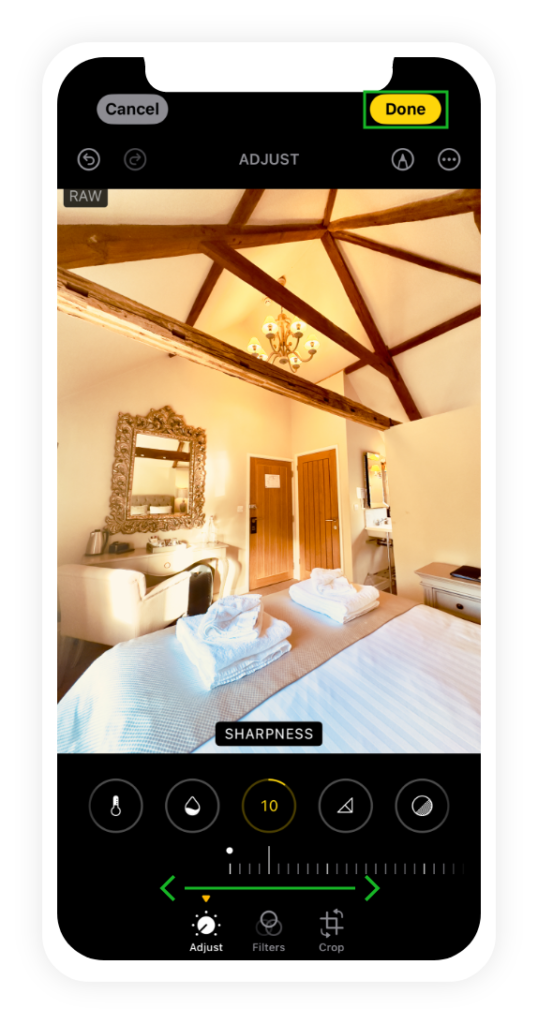
STEP SEVEN
Now apply a little ‘Sharpness’ via the slider and click ‘Done’ when finished editing
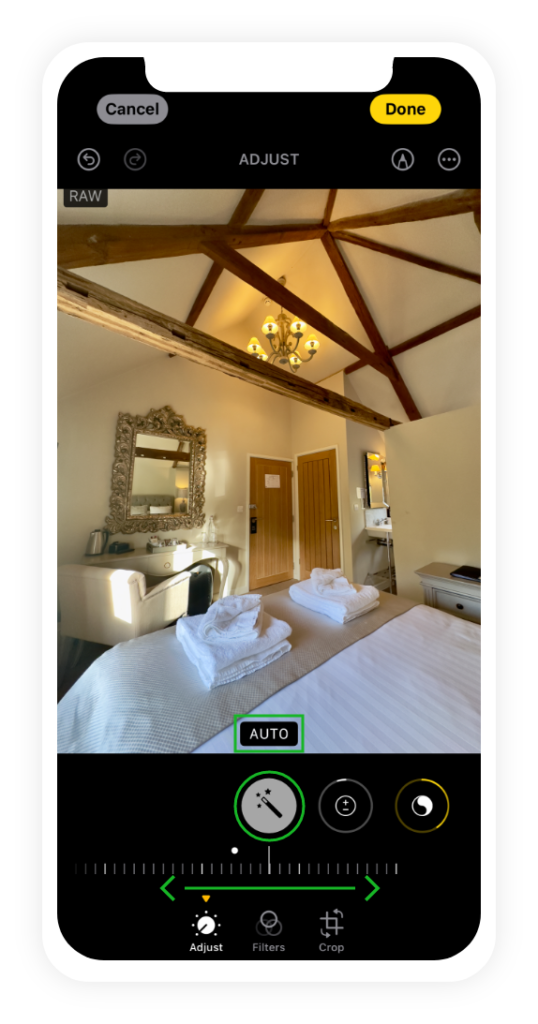
STEP TWO
Try the ‘Auto’ edit slider
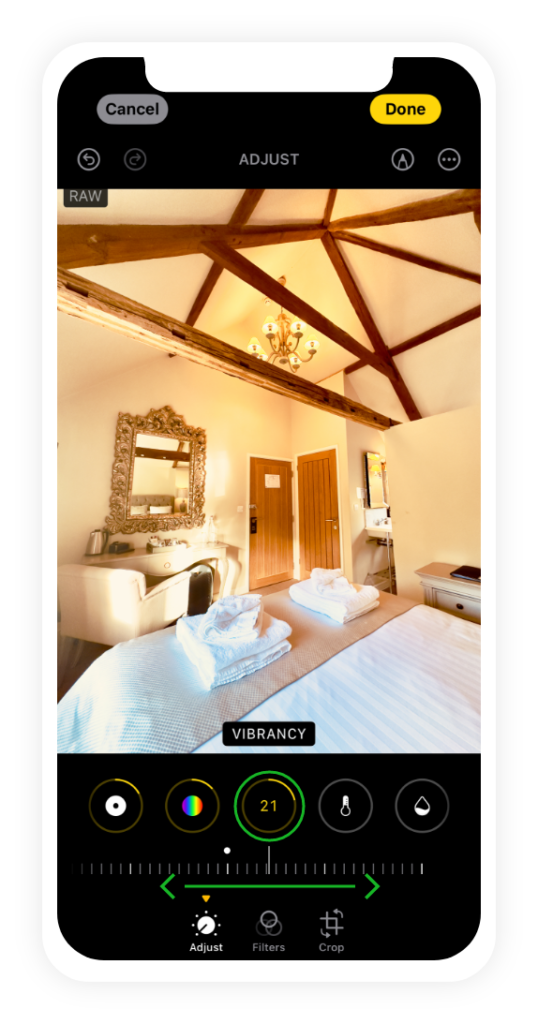
STEP FIVE
Now the colour ‘Vibrancy’ slider
STEP EIGHT
If you’re not happy with the results after clicking ‘Done’, just click ‘Edit’ again and you’ll see ‘Revert’. This option can reset the photo back to the original
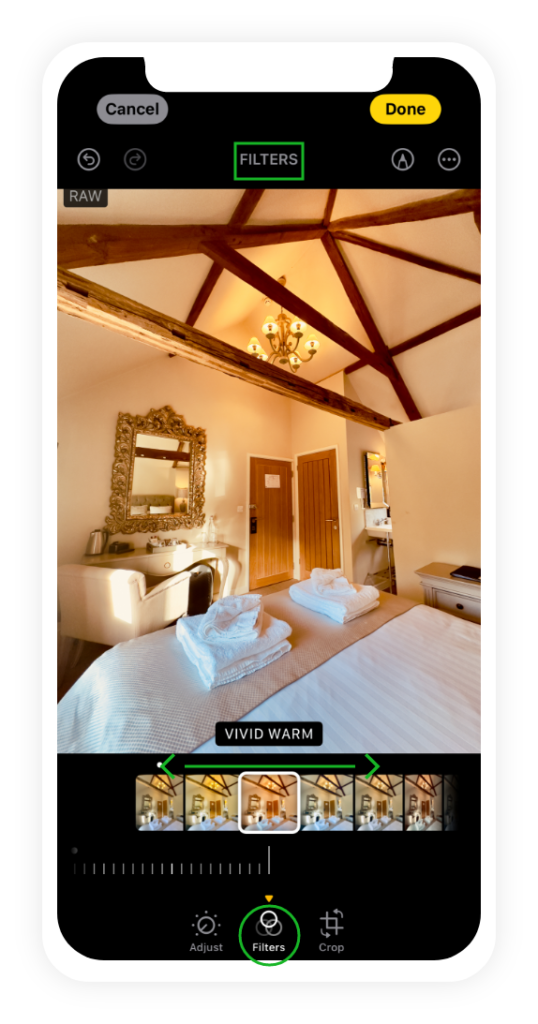
STEP THREE
Select and try applying the different ‘Filters’
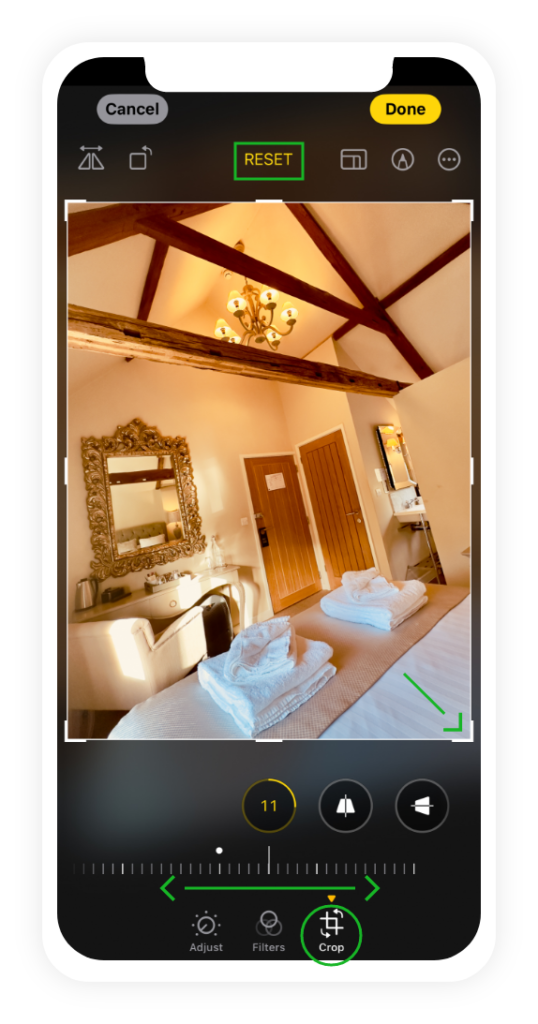
STEP SIX
Now click on ‘Crop’ to use the ‘Straighten’ slider and pull the edges in, only if needed. You can hit the ‘Reset’ option to go back if desired